DE⫶TR -- End-to-End Object Detection with Transformers
An End to End pipeline for Object Detection.


The code has been forked from this awesome video tutorial, and the here is the git repo
# detr/datasets/construction.py
class ConstructionDetection(torchvision.datasets.CocoDetection):
    def __init__(self, img_folder, ann_file, transforms, return_masks):
        super(ConstructionDetection, self).__init__(img_folder, ann_file)
        self._transforms = transforms
        self.prepare = ConvertCocoPolysToMask(return_masks)

    def __getitem__(self, idx):
        img, target = super(ConstructionDetection, self).__getitem__(idx)
        image_id = self.ids[idx]
        target = {'image_id': image_id, 'annotations': target}
        img, target = self.prepare(img, target)
        if self._transforms is not None:
            img, target = self._transforms(img, target)
        return img, target
Our dataset class ConstructionDetection is inherited from torchvision.datasets.CocoDetection, and it does all the weight lifting of calling images and the labels. We than apply our transformations if any to the images, and serve the tuple of images and labels.
# detr/datasets/construction.py

import datasets.transforms as T

normalize = T.Compose([
        T.ToTensor(),
        T.Normalize([0.485, 0.456, 0.406], [0.229, 0.224, 0.225])
    ])

scales = [480, 512, 544, 576, 608, 640, 672, 704, 736, 768, 800]

if image_set == 'train':
    return T.Compose([
        T.RandomHorizontalFlip(),
        T.RandomSelect(
            T.RandomResize(scales, max_size=1333),
            T.Compose([
                T.RandomResize([400, 500, 600]),
                T.RandomSizeCrop(384, 600),
                T.RandomResize(scales, max_size=1333),
            ])
        ),
        normalize,
    ])

if image_set == 'val':
    return T.Compose([
        T.RandomResize([800], max_size=1333),
        normalize,
    ])
DETR uses ImageNet standard-deviation and mean for the normalization.
For training dataloader, the transformations have Random Horizontal Flip and than it randomly selects between a Random Resize or collection of Random Resize, Random Size Crop and again Random Resize. The random resizing takes place at various scales of [480, 512, 544, 576, 608, 640, 672, 704, 736, 768, 800]
Whereas for validation, the images are resized to width of 800, with the height of max 1333 and than normalized.
# detr/main.py

if args.resume:
        if args.resume.startswith('https'): # If argument is link
            checkpoint = torch.hub.load_state_dict_from_url(
                args.resume, map_location='cpu', check_hash=True)
            del checkpoint['model']['class_embed.weight']
            del checkpoint['model']['class_embed.bias']
            strict_ = False # To allow model to load without class_embed if num classes is different
        else: # if argument is .pth file
            checkpoint = torch.load(args.resume, map_location='cpu')
            strict_ = True # Since we use our own pth, the num classes remain same, so strict loading
We fine-tune(transfer learning) the DETR-r50 model which is trained on COCO dataset, to learn on our Custom dataset.
The model which is trained on COCO has 91 classes, and the num_classes for DETR is 92 here, as DETR also have no-object class. But whereas our dataset only has 63 classes, we can reduce the final layer to 63 from 92. We could have also kept it to 92, as it wouldn't effect the result apart from slight increase in number of parameters as mentioned by the authors. As the weights won't take part in the prediction and would be just dead weights.
As we will see in the next part of Panoptic Segmentation, where the authors use 250 as number of classes, since it doesn't effect. Only thing to take care is num_classes must be atleast one greater than actual number of class.
1,32 and 94, than we will have to keep the num_classes as 95. The no-object class will be one greater than the max_id of the classes.
if args.dataset_file == "construction":
    num_classes = 63+1 # 63 Classes + 1 for no object
if args.dataset_file == "construction_panoptic":
    # for panoptic, we just add a num_classes that is large enough to hold
    # max_obj_id + 1, but the exact value doesn't really matter
    num_classes = 63+1
We had marked classes from 0 to 47 for things and from 48-63 for stuff, so for us the max_id for the classes is 63, hence we can give num_classes as 63+1, where the 1 class at end is for no-object
!python main.py --dataset_file construction --data_path ./datasets \
        --device cuda --output_dir /content/output --resume https://dl.fbaipublicfiles.com/detr/detr-r50-e632da11.pth \
        --epochs <number_of_epochs> --batch_size <batch_size>
If we see, we can pass link to resume argument, which is the pre trained weight of COCO, which is used to start the training from, and after each epoch, the weights of the epoch is saved in the output folder.
So, we can continue training from the last epoch, by passing the checkpoint weights path to the resume argument, and the training will start from the last epoch.
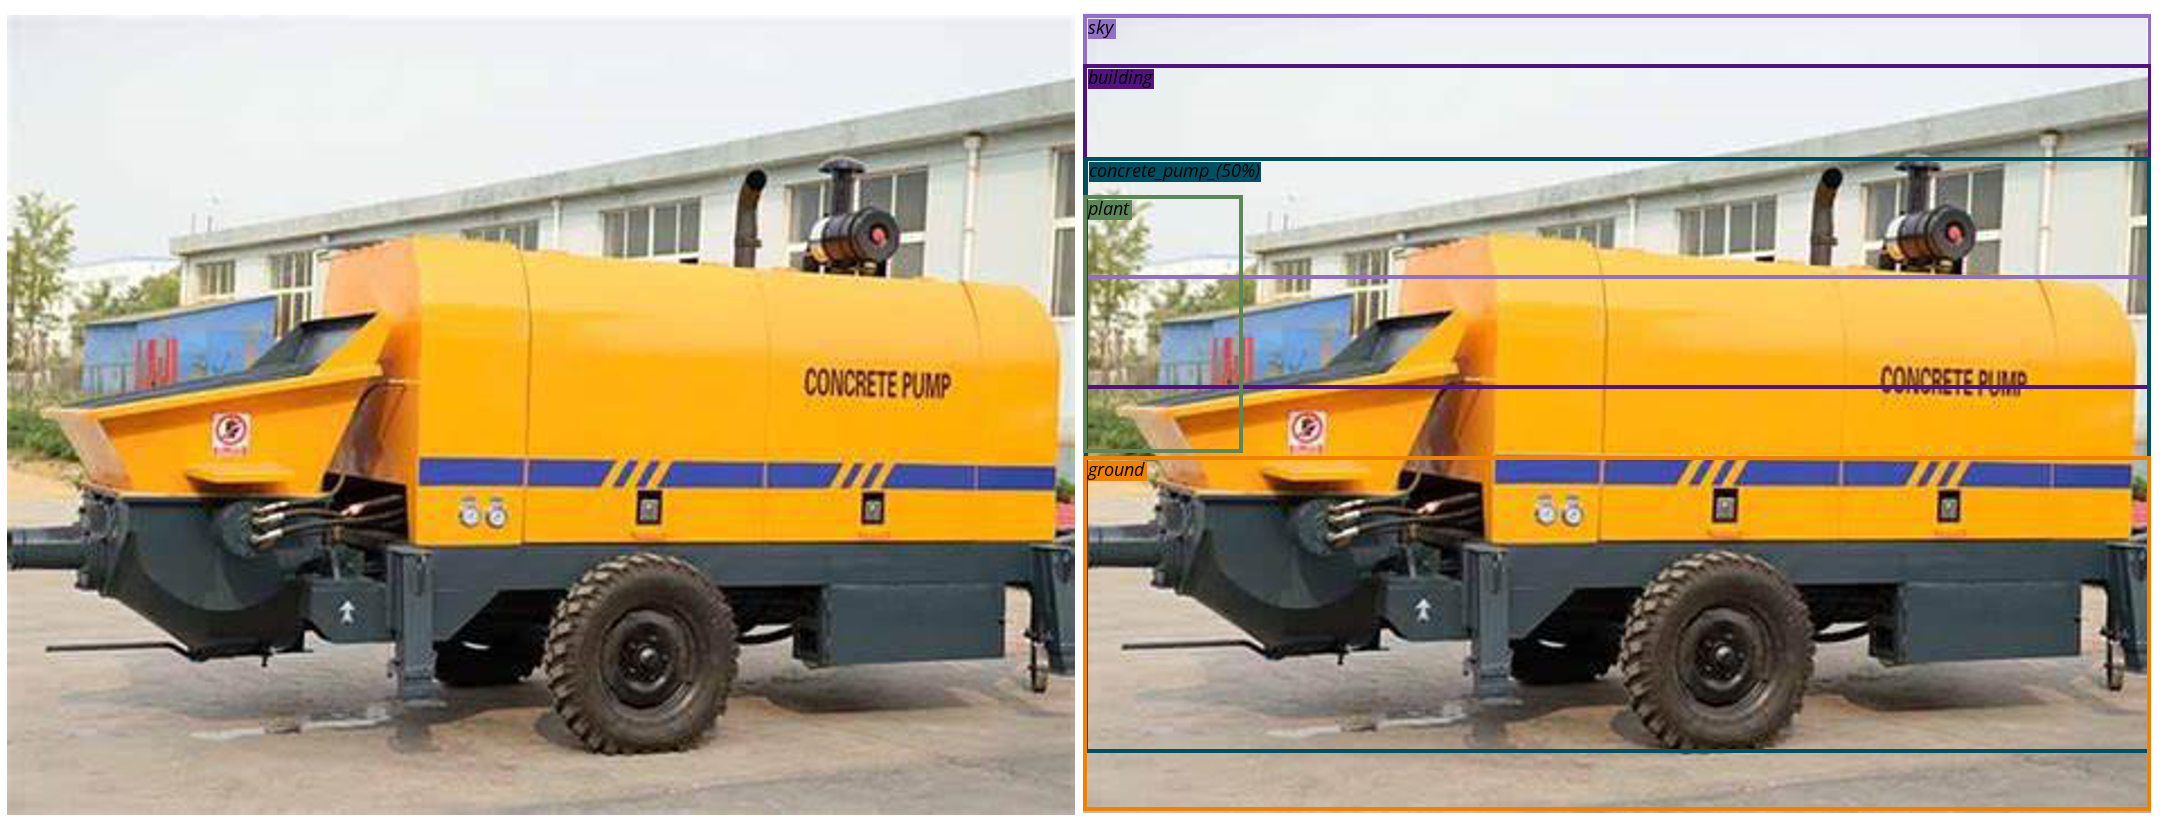
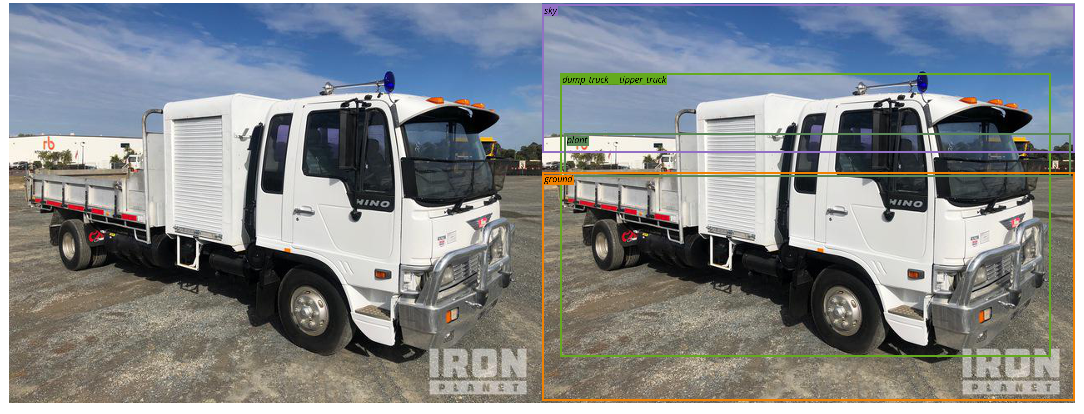
# detr/test.py
orig_image = Image.open(img_sample)
transform = make_coco_transforms("val") # Resize to 800 and normalize
outputs = model(image)
outputs["pred_logits"] = outputs["pred_logits"].cpu() # Get Prediction Scores
outputs["pred_boxes"] = outputs["pred_boxes"].cpu() # Get Predtiction Bounding Boxes
# keep = probas.max(-1).values > 0.85
keep = probas.max(-1).values > args.thresh
# Rescale the predictions from 0,1 to image size
bboxes_scaled = rescale_bboxes(outputs['pred_boxes'][0, keep], orig_image.size)
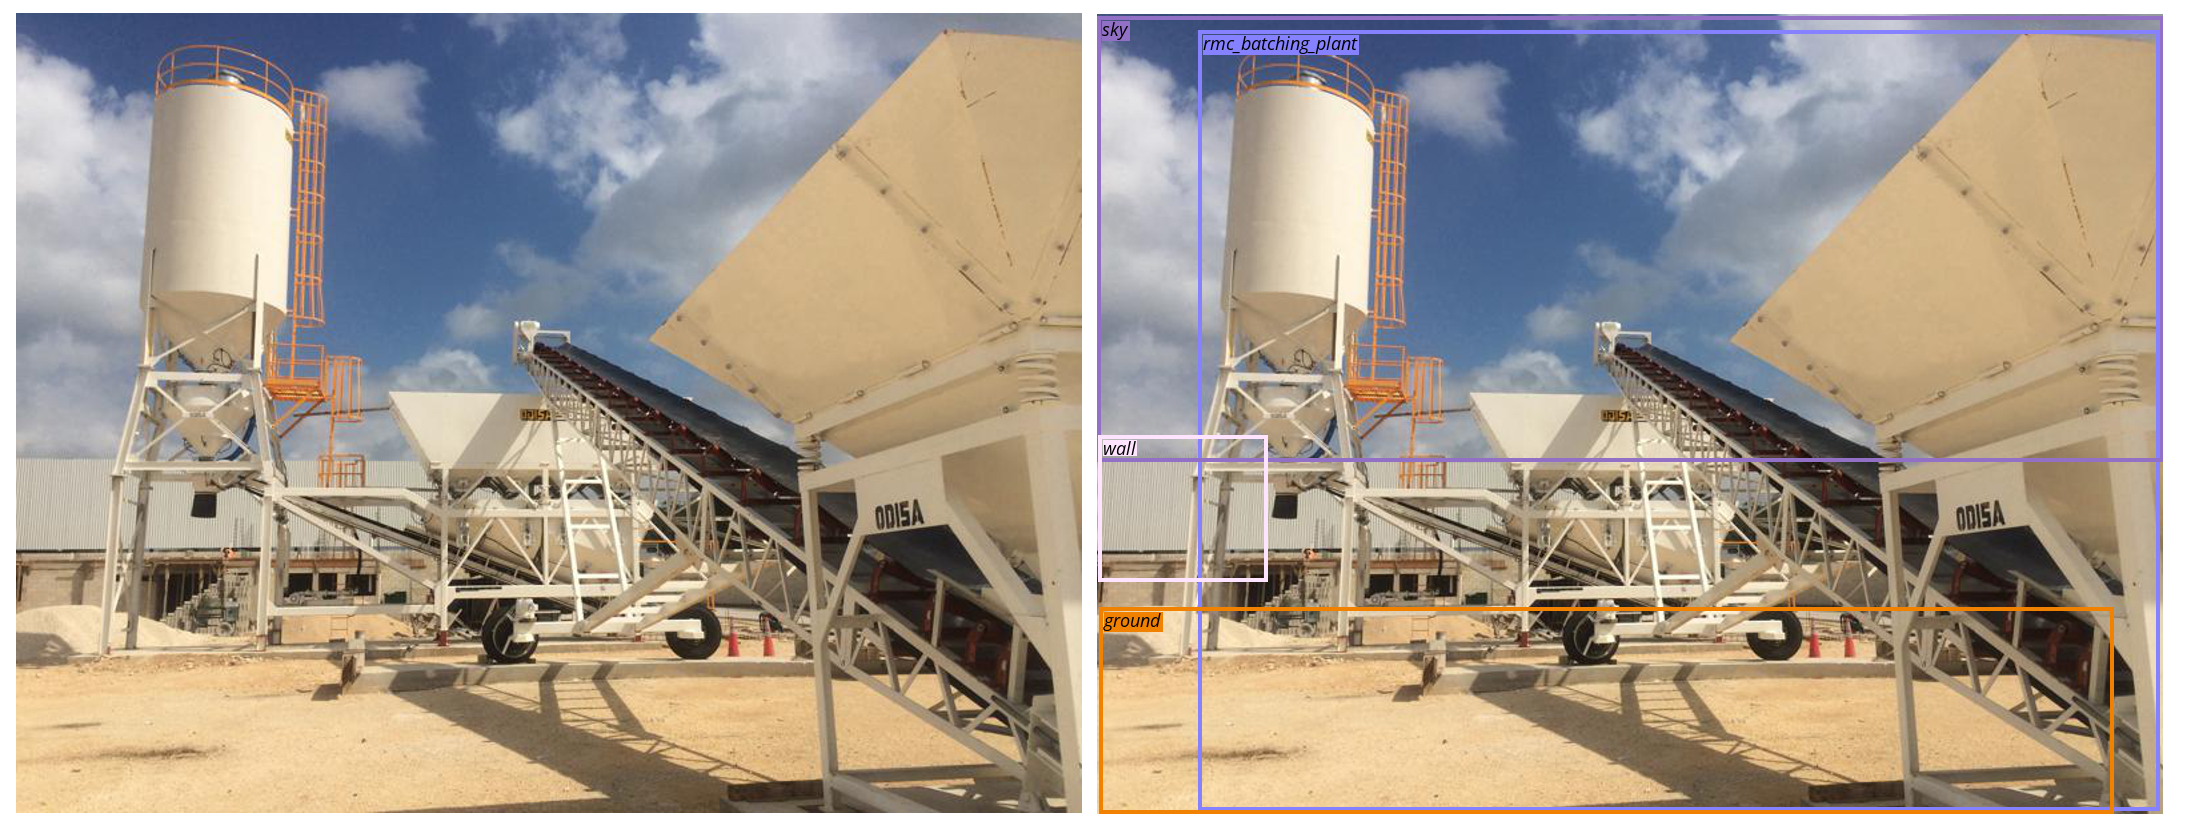
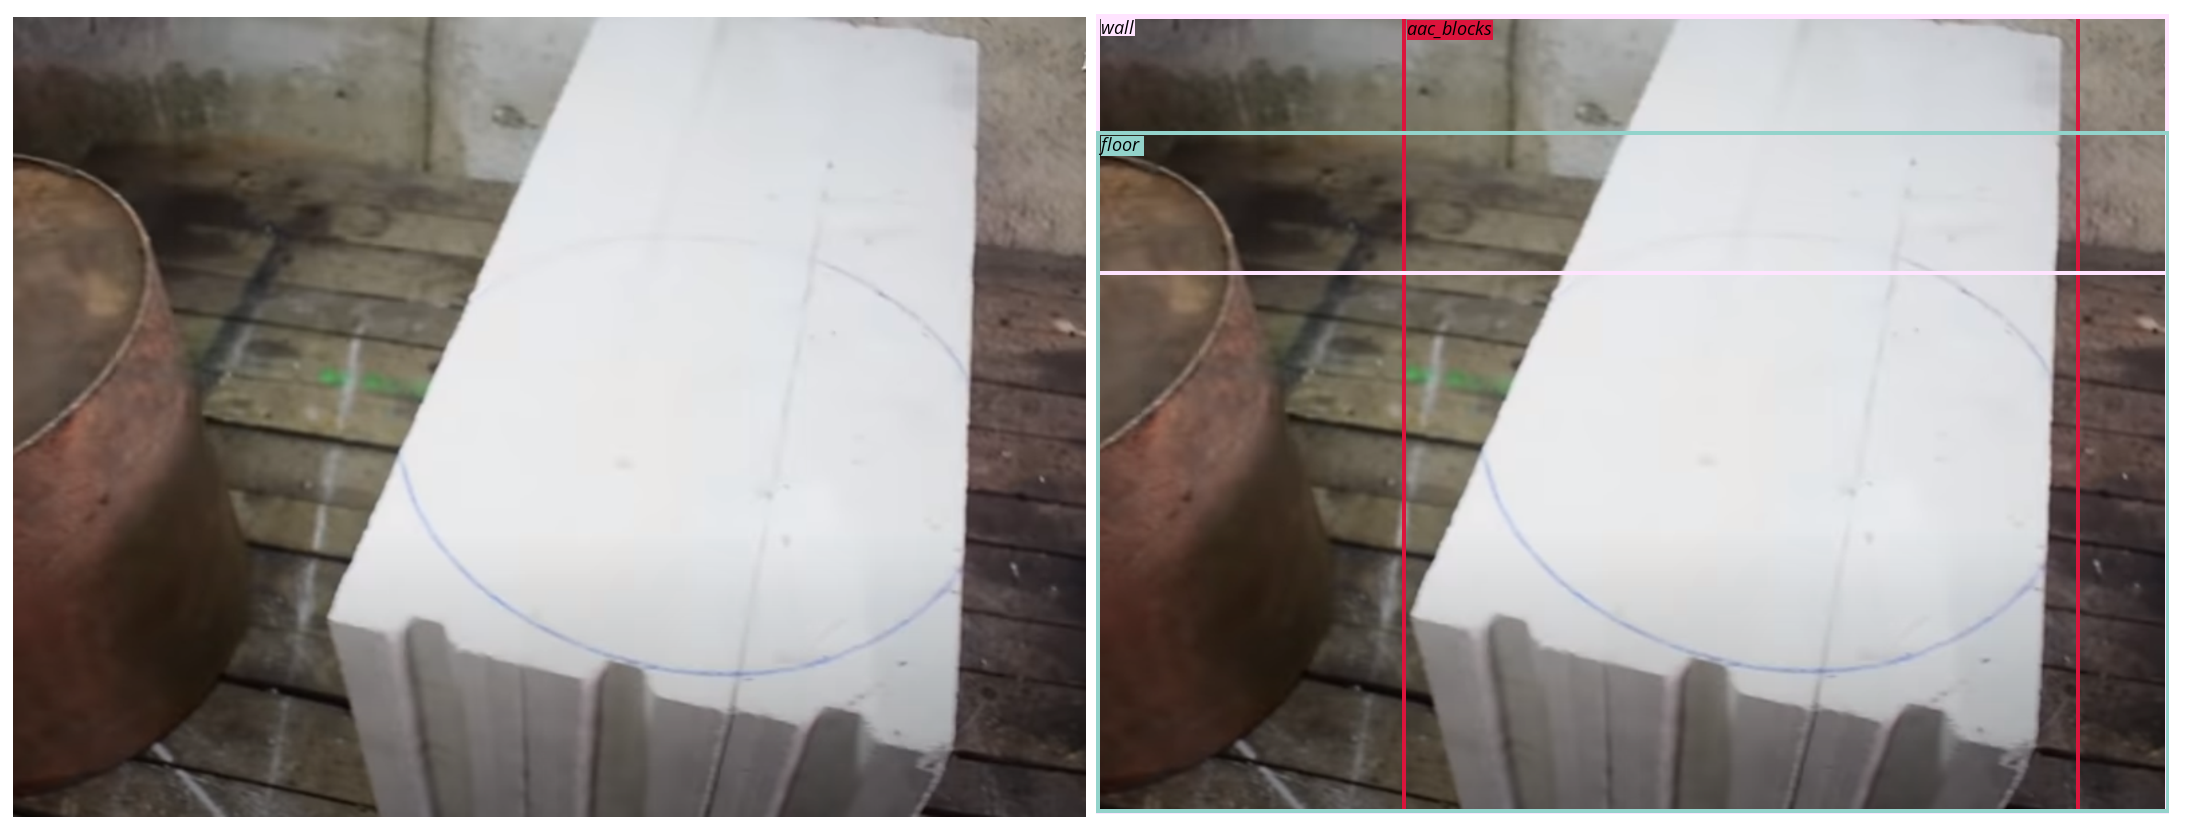
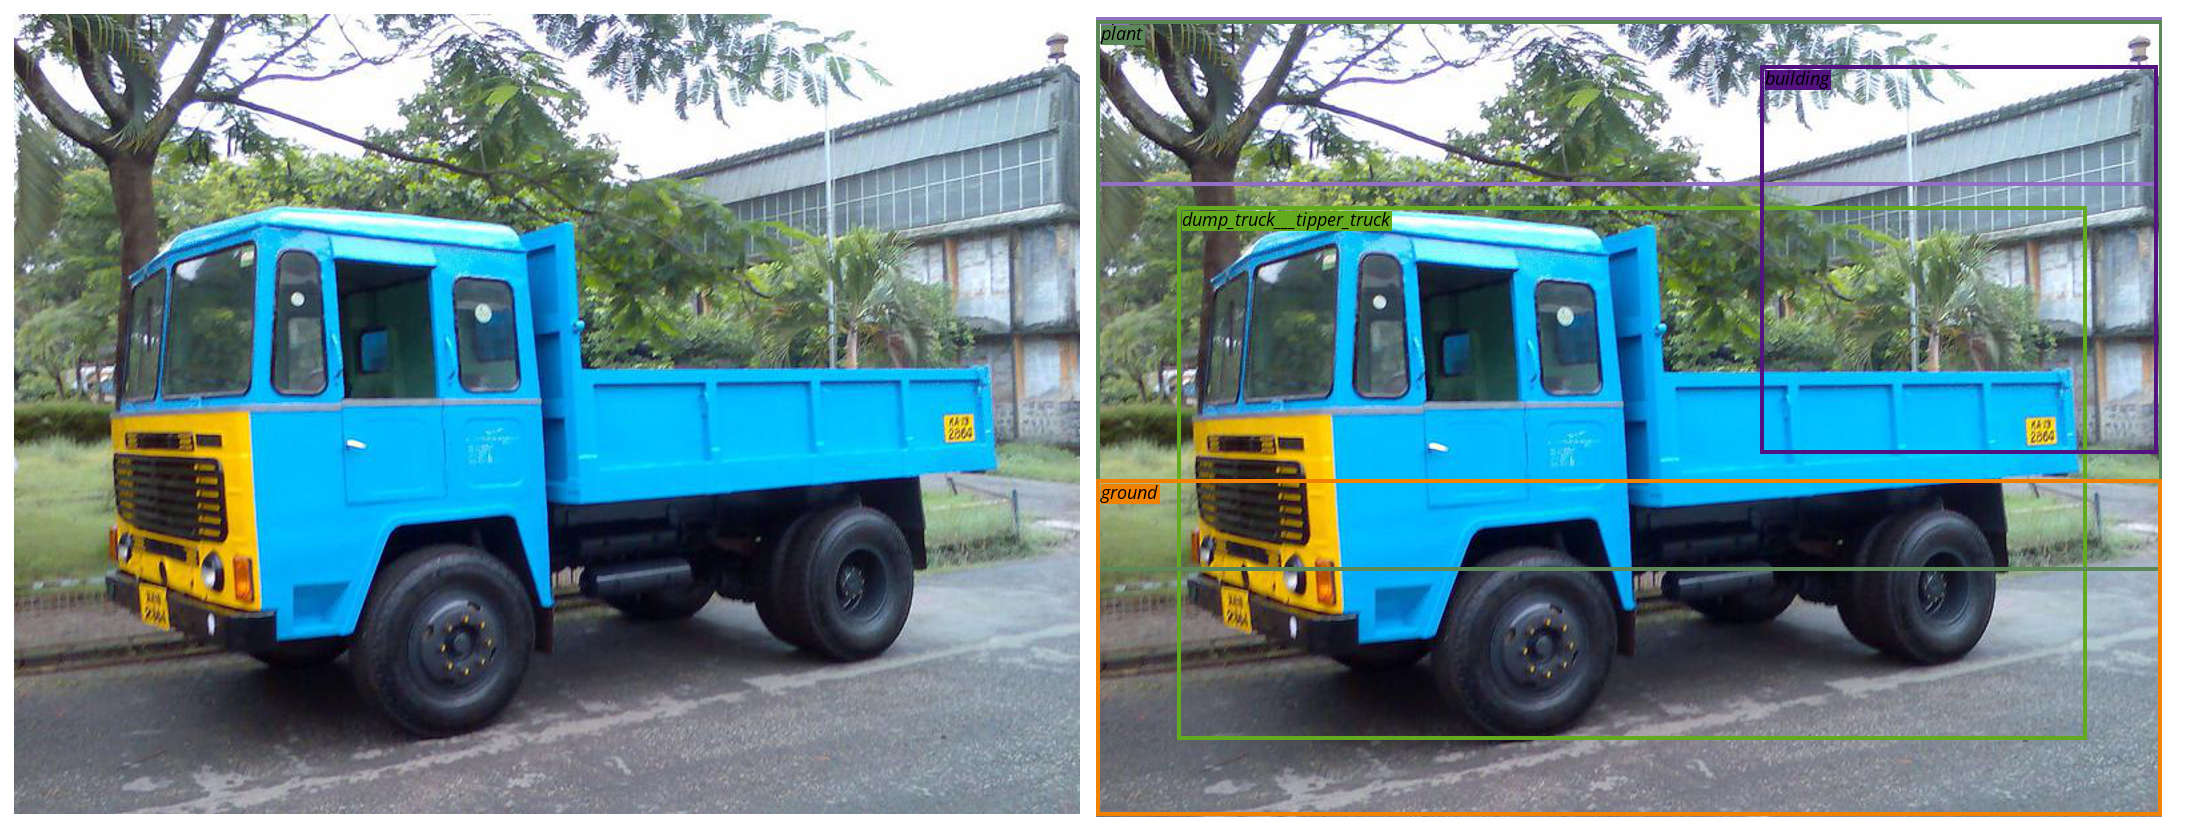
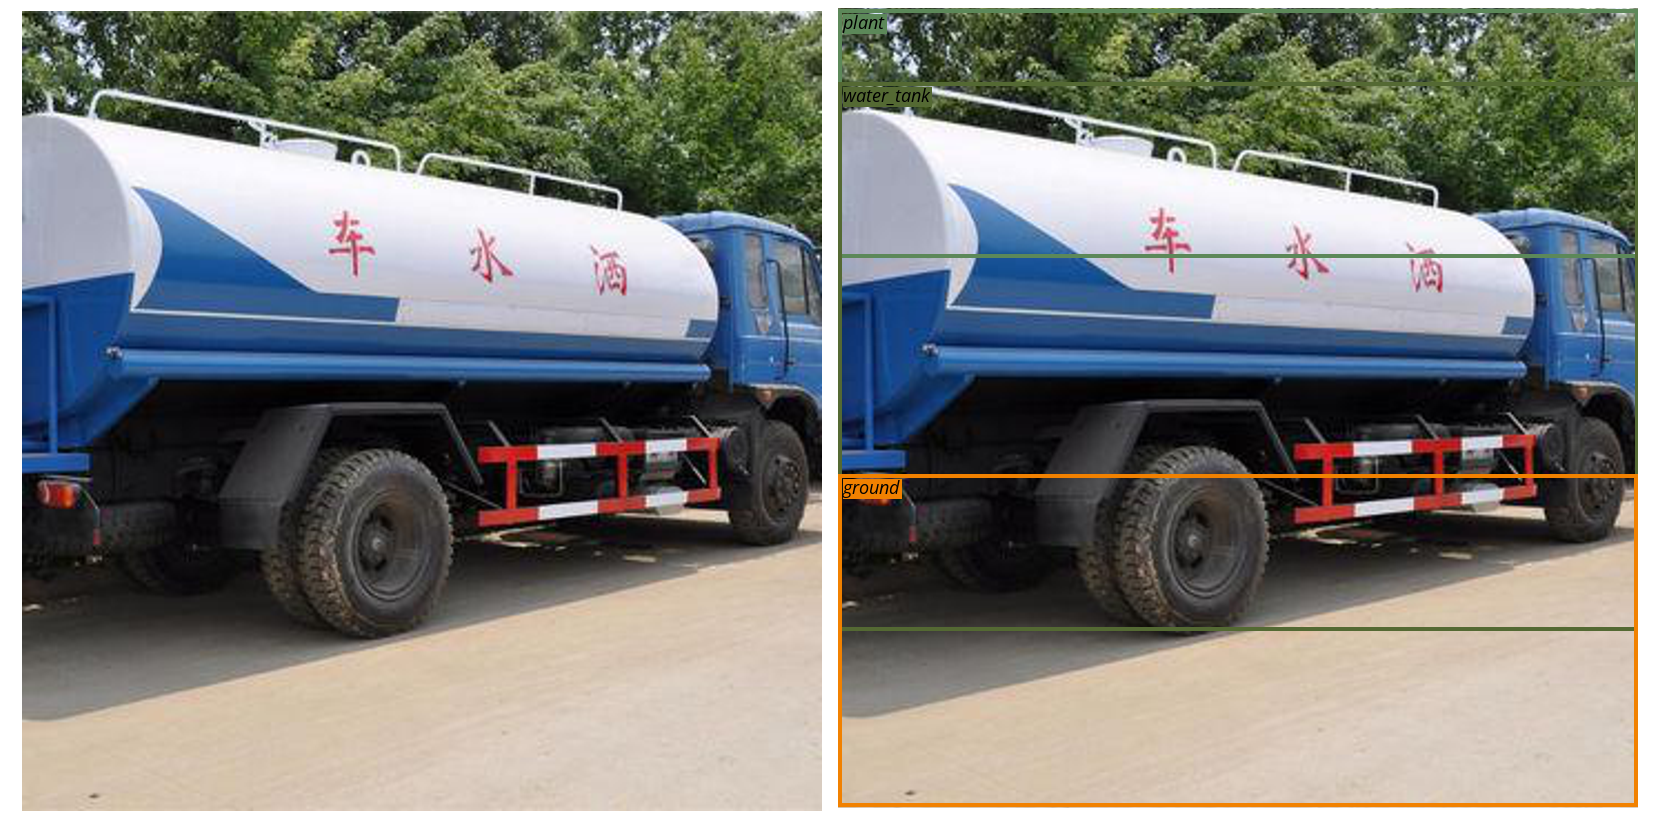
plot_bbox(image, bboxes_scaled)
mAP (mean Average Precision)
In computer vision, mAP is a popular evaluation metric used for object detection.
Before understanding let's see what is Precision and Recall
Precision measures how accurate your predictions are. i.e. the percentage of your predictions are correct. It measures how many of the predictions that your model made were actually correct.
Recall measures how well you find all the positives i.e. for all the correct ground truth, the percetange of your predictions are correct.
We can see that the numerator for both Precision and Recall has True Positives, but the denominator changes for each. Both are equally important and depens on the application, and many times it's used in together by using harmonic mean for F1-score and so on.
INFO:Excellent explanation on Precision and Recall with great examples - YouTube Link
In classification, getting True Positives, False Positives and False Negatives, is straight forward, where if the ground truth is cat, and the model predicted is cat, than it's a True Postive, where as if the model predicts cat and it's not a cat, which indicated False Positive, and if the model predicts not cat and it's a cat, which indicated False Negative.
In simpler words, its combination of did model predict correct (True/False), what is the class (Postive/Negative).
But how do we get all these in Object Detection, where the model not only finds the class but also the Bounding Box, and for that let's take a small de tour to understand IoU.
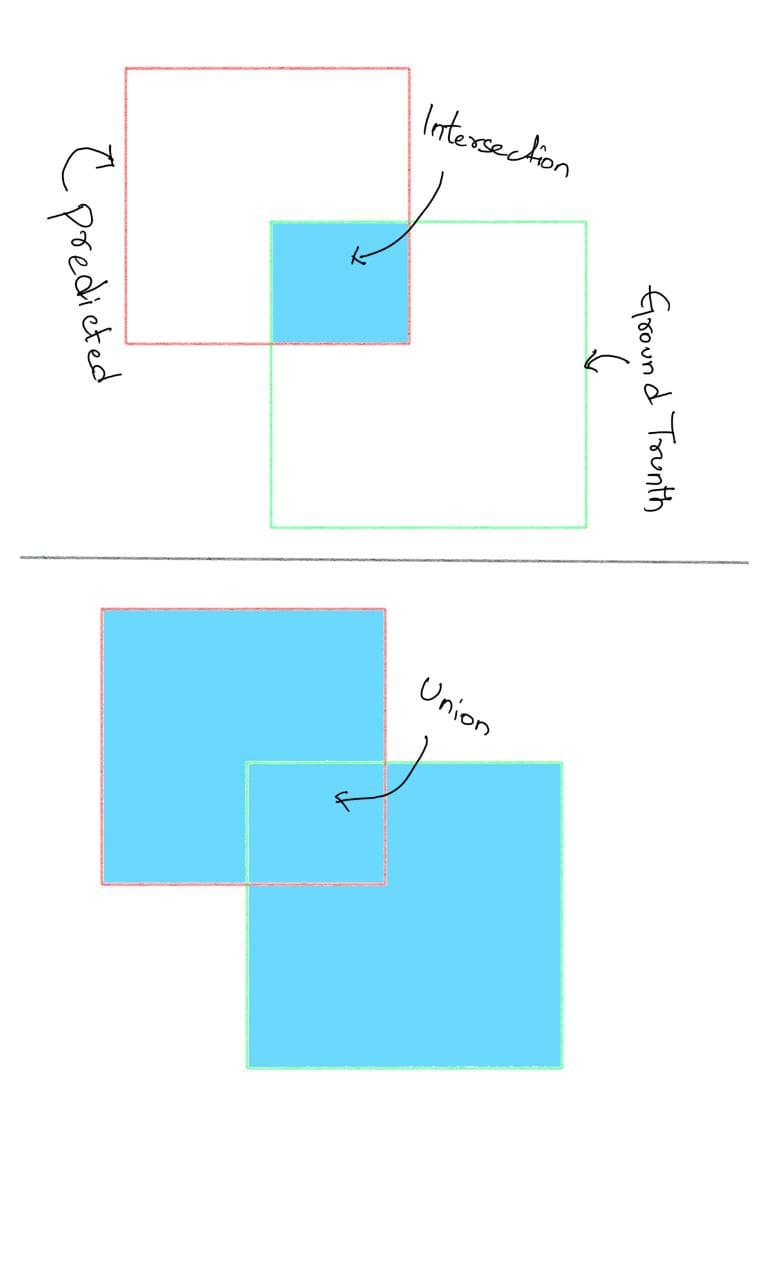
IoU (Intersection over Union)
For each bounding box, we measure an overlap between the predicted bounding box and the ground truth bounding box. This is measured by IoU(intersection over union).
Which is the intersection of the ground truth box with the predicted box, divided by the union of the ground truth box with the predicted box.
Now, since we know about IoU, in Object Detection, for True Positive, we assign a threshold to the IoU, and if the IoU is greater than the threshold, then it's a True Positive and if not, then it's a False Positive.
Let's say we have a ground truth bounding box of [0,0,100,100] and the model predicts a bounding box of [50,50,100,100], then the IoU is 0.5, which is less than the threshold of 0.5, so it's a False Positive when thresshold is 0.5. But the same predicted box will be a True Positive if the IoU is less than 0.5 say 0.3.
Average Precision (or even mean Average Precision) is the average over all categories of the precision at particular IoU threshold, and is denoted as mAP@0.x, where 0.x is the IoU threshold.
We also have soemthing as mAP@0.5:0.95:0.05 which is the mean over all APs ranging from 0.5 to 0.95 at every step of 0.05.